Showing posts with label skirt. Show all posts

Saturday, August 22, 2015

Complete: A Jacket & Leftover Skirt

I'm back this week with an attempt to triumph over vanity. Well, to at least let pride triumph over vanity...which doesn't sound all that laudable at all, really. I'll explain - this is one of my favourite ever things to wear that I've made, coupled with some of my least liked photos (own fault: felt wretched, should've stayed home, soldiered on and can see it in every shot. Never mind, we can't all be models!)
 

This jacket is a pattern released by Spotlight here in Australia, oh, maybe seven years ago, as part of their then Get Creative range. I bought it at the time in case I ever tried making clothes for myself sometime in the future (!), and promptly forgot about it. The fabric, a wine -not purple - coloured pinwale corduroy I bought two years ago in case I ever tried making a casual blazer, and promptly forgot about it.
 
The pattern calls itself a military-style jacket. I didn't make any structural modifications; the only changes I made were to not do the three rows of topstitching at each seam (not avoidance, I just thought it would be lost and wasted on corduroy), and to lose the front tie fastenings (which looked fussy and annoying).
 

The above photo is from May, which I've included because I actually look happy in this shot. Plus, this outfit (jacket, Kanerva blouse and Burda pants) is one of my all-time favourites, self-made or otherwise, which I think is worth acknowledging!

In far less happy shots...


 As mentioned above, this jacket had tie fastenings, so doesn't do up at the front. I was dubious at first (wouldn't it just look too small?) but I actually really like how it sits. The shaping in it gives a nice line, and it doesn't feel at all restrictive like a done-up blazer sometimes can.

 Instead of the ties, I experimented with these patches for (non-functioning) buttonholes and buttons.


I sewed them on a very slight diagonal, with the cord's direction contrasting with the fabric underneath. The vintage buttons were a surprise gift from Sarah along with one of her giveaways; I'd been saving them up waiting for the perfect project.

 
I mentioned a few posts ago that I've been trying to find uses for my ever-growing pile of scraps and leftovers. Well, this gets a double tick! There was no lining drafted for the pattern itself, just wide facings at front, back yoke and hem. I'd overlocked the other seams, which were also top-stitched (just once though), and they looked fine. But I thought I'd to try something a bit special on the facings' edges, and so bound them with some of the leftover silk from my Vogue 1152 dress. Confession: it's not cut strictly on the bias, since there wasn't enough fabric, but since all the edges were straight or diagonal I didn't think it would matter too much. I love the effect! 
 
 
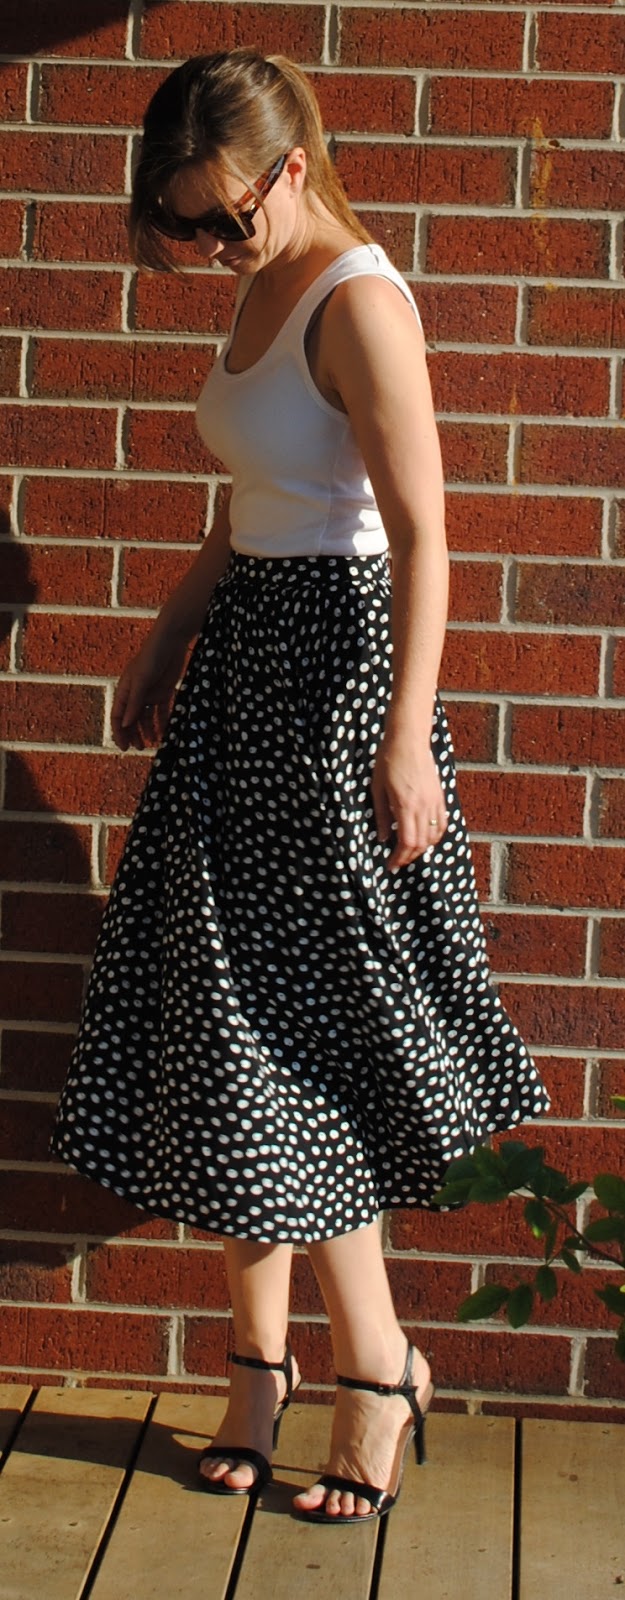
The other tick is given for, wait for it: getting a whole other garment out of the leftovers! True, the hem isn't as generous as it should be and the back piece is seamed rather than cut on the fold, but I'm not arguing! This is View B of Burda 7147, an A-line mini wrap skirt:
 

...and I definitely should have ironed the wrinkles out pre-photography... This is a really quick project, that can be squeezed out of just under a metre of fabric.


The fronts fold back over themselves to form facings, and snaps are sewn on to secure it.


 Some dark early morning photos there, sorry. I like an A-line silhouette, although this is a much shorter version than I'm used to. I probably wouldn't wear it without tights.


One change I did make that was choice and not necessity was to add a lining; since I planned to wear this with tights I thought that it might help stop it riding up or "sticking". And it works. I wish I could think of a way to stop it sticking to itself at the front wrap...

So, one lot of project leftovers has been used up. Now I just have to find ways to use up the rest of the drawer!

Saturday, July 18, 2015

A Refashion For Me & My Girl

Hello again :) I'm not sure why I'm always so optimistic at the prospect of school holidays potentially equalling extra sewing and blogging time; once again history proves me wrong. Back into term time again, and here I am finally getting back to posting.

To be honest, I wasn't sure whether to record this one - it's almost as basic a refashion as they come! But simple though it was, it's been a success on two fronts, so here 'tis:

Last September a op shop jaunt netted me this spotted rayon dress. It was too big all over, and elastic waists are rarely friendly to me. I think it was also intended for a taller person than me (left) or my daughter (right)


So why buy it? Easy:
a) Having discovered rayon this past year I'm a little bit in love! It breathes and moves like silk and is as cooperative to sew as cotton.
b) It reminded me (albeit as a black and white, ill-fitting version) of the dress Julia Roberts wore for the polo scene in Pretty Woman - don't tell me you didn't love it too...
c) it was $2.

Done deal.

Originally I planned to unpick it and make it up again as the polo dress. There would have been quite a lot of faffing about with the armscyes though - they're very low. So it got pushed down the queue, until it occurred to me that I'd been pinning an awful lot of midi length skirts, and my girl loves to wear slouchy, breezy, layered tops in warm weather....Double win!

The dress was constructed as a separate top and (four panel) skirt, then narrow elastic was sewn to the waist seam. I unpicked this and detached the two.


I far prefer waistbands to elastic waists, especially if I intend to wear tucked in tops. I had a bit of extra length to play with, but wanted to keep it as full as possible. So I cut 6cm from the upper edge of the skirt, which gave me plenty for a waistband. The fact that the skirt was sewn in four panels meant that as a waistband it didn't quite match up neatly as a three piece front and two backs; the "side" seams on the finished band are more towards the front. But it is centred and the print disguises that flaw well.


There wasn't quite enough to cut a facing from the fabric as well, so I had to make do with some black cotton in my scraps stash, but it matches and is on the inside so isn't seen. The main skirt was gathered and then sewn to the new waistband. Then I undid the back centre seam 20cm and inserted a zip.


 The end result is swishy and breezy and I love it! And though a summer skirt really, it's done pretty good service in cooler weather too, with a collared shirt, jumper, tights and long boots. (So long as it's not too cold out...)

The top could hardly have been easier! Once the elastic was gone, I just had to press the gathers/wrinkles out and give it a narrow hem.


 Voila! An easy cropped top for layering (since, thank heaven, she's not into the bare midriff look!)
Not much call for sleeveless tops round here at the moment - right now warm weather is a fond and distant memory - but summer's got to return one day....

So pretty basic really, but a fun and satisfying - and quick! - project. I mentioned in my MMM reflections post that I've fallen out of the habit of refashioning; this make(s) has gotten me excited about it again. And I noticed that this year's Refashioners challenge (which by the by looks amazing! The talent - oh my!) is running a community challenge alongside the main one. I think I'll give it a go....

Sunday, January 4, 2015

Complete: Nostalgia Skirt


Happy New Year everyone! Hope yours has begun happily and heathily. 

Now this technically isn't the first make of the year, but I've got something of a backlog of unblogged projects (mojo was running high during October and November...) I have a feeling this may not be to everyone's taste, but I really don't mind that because personally I love it. Do you know, it occurs to me that before I started sewing for myself two years ago I could never have said that? Much less, meant it? Sewing really has given me much more confidence in my own opinions and taste!

I very rarely impulse buy fabric anymore - I like having a controllable stash far too much :) But occasionally if I spy a really wonderful print or just the right kind of sparkle that piece is going to come home with me. And so it was with this ever so slightly sheeny, made-in-Italy gem I found in the remnant basket at my local warehouse. It's a collection of painted city scenes, cafes, restaurants etc, printed in all directions. Having held it up from each edge in turn in front of family members, the verdict was evenly split over which way was up so I figured it didn't matter. There was just 60cm left, which I was hoping would be enough for a longer line pencil skirt, using trusty old New Look 6107. (Two other me-made favourites from this pattern here, and here)


The reason I loved this print so immediately was that it reminded me vividly of a painting of my grandfather's, an artist, that used to hang in their holiday home. That was a cityscape too, and I remember I used to love staring at it when I was little. There was a real energy to the scene, and part of me was genuinely convinced that if I just looked long enough or at just the right moment I'd see the people and trams start to move....It was one of my favourite things about visiting there :)

Naturally, I wasn't about to leave it in the remnant bin! Here's a close up - you can see some upside down people near the top... 


My art knowledge certainly isn't all it could be, so I've no idea whether this is / these are famous pieces, and I don't recognise the signature below. If it is well known and anyone could enlighten me as to the artist, I'd love to know!


Aside: Here's a tip I wish I'd heard before prewashing this fabric - serge or zigzag over the cut edges first. Not doing this cost me 5cm (2") of length - believe me when I tell you this stuff frays like no one's business. In any case, it's not quite as long as I planned and hoped for...


What was left after prewashing gave me enough to cut a length halfway between view D & E.


The size 8 is a comfortable fit at the waist and hips on me, but I wanted it a bit more tapered at the hem. In the previous versions I did this at the back seam, but since I wanted to have the kick pleat on this one, I took it in at the side seams instead. 1" at both seams was enough to shape it and still allow for walking comfortably. Which is important. (And my one quibble with the BHL Charlotte skirt)


The fabric wasn't flimsy, but I wasn't sure whether it had enough weight to cope with tucked in tops, so I underlined it in a beige poplin. It's nicely structured now. Edges were just overlocked, and I quite like the look of the patterned seams against the plain insides.


 I found the waist band seams were getting quite bulky, even after layering/trimming, so I decided to try binding the lower edge of the facing with bias binding - a decision made easier by the fact that I already had some just the right colour. I hadn't tried this before, and I really like it; it's a nice little finish.


This, I foretell, is going to be a pretty useful transitional piece. It's a bit heavy for hot weather, but for most of the rest of the year I think I'll get plenty of wear of it. (We had a cold snap in October so I can confidently state it also works very well with a jumper, tights and boots). Win!

Last post I shared re goals for 2015, particularly re slowing down and sewing fewer garments, but putting more care into ensuring I made each one the best I could. There was a photo I'd seen on Pinterest, that was actually what starting me thinking along those lines. I couldn't find it while I was writing the last time, but have since:


I don't know who these women are, where they're from, or anything about them, but I was so inspired by this photo. All that incredible, intricate, painstaking work! It's just extraordinary. 

2014 for me unintentionally became about making as many items on my master list as possible. In retrospect, I'm not sure that really fits into the ideals behind 'slow' fashion, which is what prompted me to start sewing my clothes rather than buying RTW. I know I had ideas about garments, in terms of finishing, embellishment or technique, that I dismissed because "it would take too long". (Even on this skirt, I debated trying Hong Kong seams and didn't, solely because of that.) I want to get to the end of 2015 having made garments I'm really proud of. That's the plan, anyway! 

What are your plans for 2015? 


Friday, January 17, 2014

Complete: Homage Skirt

...Because "homage" sounds much nicer than "ripoff" ;)

I'd planned to write this post earlier this week, but it's been an unusual few days. As any Australian readers will know all too well, we've been sweltering through the hottest stretch of weather since 1908- that's the Victorian statistic anyway. And in Australia, that typically means bushfires. We didn't quite get to the point of evacuation, but friends just 3km away did. As it was, the car was packed with bare essentials ready to go at any point. Five separate "incidents" - official term - within 20km of home is pretty spooky for a most-of-her-life-suburbanite! In any case, blogging kind of slipped down the list of priorities....

But it was kind of enlightening, looking at the sparsely packed car, to realise how few material things in life are genuine essentials. Evidently my decluttering journey still has some way to go.

But, on to sewing. This is actually my last make of last year; I wanted something new to wear on Christmas Day. And ever since I saw Sarah of Fabric Tragic's Monet on Acid Charlotte Skirt I've really wanted something similar of my own - a bright floral with a design solid enough to look great as a summer or winter skirt. A trip to Rathdowne Remnants yielded me just the thing; a cheerful (slight) stretch cotton, bright florals on a black background. (I was meant to be helping to look for bridesmaid fabric, but the bride didn't mind me diverting for just a moment.)


Now I do have Charlotte Skirt pattern, and have used it, but I decided to go with New Look 6107, which I used just recently for my sequin skirt. (Which, by the way, has already has several outings. I love it more every time I wear it, and I can't believe I forgot to include it in my official Top 5). I like the lower waist band on this pattern for a more casual skirt, plus it's easier to walk in than the Charlotte. Also, using a different pattern made me feel a little less mindlessly imitative!


I wore it Christmas Day with my white Rowe top tucked in - which was actually my first Me Made Outfit. (I'm not sure if you can call a dress an outfit, can you??) It felt good - I can make coordinating items!!

I made it up exactly as I did the sequin skirt, with the same sizing and (minor) modifications. I have noticed though that this skirt, if I've been sitting down for any stretch of time, tends to get that horizontal fold in front. (You can see that in the front photo above) I'm not sure whether that's because it needed to be graded a little larger at the hips, or if it's just creases from wear. I think it's the latter; my sequin one certainly doesn't do that, and that fabric (plus underlining) is a good deal thicker. Although it may have a bit more stretch to it...Funny how different fabrics behave differently.

I did underline the skirt with a black voile, because I wanted to make sure the fabric was sturdy enough for the skirt style (and didn't create a VPL). On reflection though, I probably negated the stretch by doing so. I've worn it a couple of times since Christmas, and the fold really only happens after a few hours of wear. To be honest, it doesn't bother me too much anyway. Just something to note for next time :)


I did taper the back seam down to 2cm in from the seam allowance at the hem, like I did previously. I prefer the line that gives the skirt - it's just that little bit more shapely. But it still allows for things like, er, walking freely...


The one genuine regret I have is that I used the voile as the waistband lining/facing. I think that I was overcompensating for the thickness of the sequin one's waistband. But this one could have done with being a wee bit firmer, plus the voile is a little too transparent for that particular ask. Am I regretful enough to redo it? Not so much, no.


On the whole, I'm really happy with this, and it ticks the boxes for being a practical, wearable, versatile make. Nice to finish the year on a good note!

Finally, thank you to all of you who expressed interest in my fabric/yarn giveaway. the winners, as drawn by my man are:

Mika of Savoury Stitches  -  the Japanese lawn.
Gillian of Crafting a Rainbow  -  the navy gingham
Sarah of Fabric Tragic   -  The Abuelita yarn

Congratulations, and may your makes be satisfying and enviable! If you could email your address to me at daniellekrivan@gmail.com I'll get those parcels winging their way to you all ASAP.

Have a wonderful week :)

Danielle oxo

Sunday, December 1, 2013

Inspired By: Festive Sewing

Hello and Happy December to you all! Since Christmas parties, work break ups and the like are just around the corner, I've been thinking Festive Sewing lately. After all, given my RTW ban this year, if I want something new I've got to DIY it. So I have!

Going back over my Pinterest boards I noticed I've pinned rather a lot of versions of these sequinned skirts:


Sequins are not really the kind of fabric I usually gravitate towards, but I really like the way this is "festive" without being too glitzy.... sequins for the introvert, if you like!

Then I found some fabric at Spotlight that I loved - a kind of muted bronze - and that decided it. I had some black silk chiffon that I thought would work as a sleeveless Style Arc Tiffany Blouse to go with it, but in the end I really wanted a top with a higher neckline to go with a mini (though not quite as mini as above!). Plus, to be completely honest, I couldn't face the thought of sewing chiffon just yet....

So instead I went with the Laurie Tee from Named Patterns. I've been wanting to try their designs since I saw them, so it was a good excuse!


At first I'd planned to use BHL's Charlotte Skirt pattern and lop off some length. But then I found New Look 6107 in amongst my patterns and thought its lower waistline and fewer darts might work better.

I already had a similarly coloured stable knit in my stash which I used to underline the sequins, since it's quite drapey and I wanted a more structured look. I used a lightweight fuse in the waistband, but I think if I ever make another I think I'd use something finer still; the seams got quite bulky.


I finished the inside seams with a zigzag stitch, but the hem I covered in wide organza ribbon folded in half and then stitched it down by hand. The raw edges where the sequins are cut are quite scratchy and I thought that the organza might give any tights I wear a fighting chance!


Now I'm not claiming to be an expert at all after one skirt, but just in case someone out there finds it useful, here are my thoughts on sewing sequinned fabric:

1.  Pick a pattern with as few seams as possible! There's no disguising seams or making them subtle - keep it simple :)

2.  Don't skimp on the basting if you underline it. Really. Do more than you think you need - it's worth it to have fabric that doesn't slip around or apart when you come to machine it. I found it really helpful to baste around the darts too.

3.  This didn't seem to be an issue with this particular fabric because the sequins are so tiny (see below), but for most of the other fabrics I saw I think it would be wise (and kinder on your machine and needle) to remove sequins along the seam lines. I've had to do that with beaded fabrics in the past, and I think most sequin fabric might require similar treatment. (I kind of wish I'd removed all of the sequins from all seam allowances in order to "de-bulk" the seams too) In which case...

4.  ....save all the removed sequins to hand sew back on once seams are sewn. Dull but again worth it.

5.  A longer stitch length seems to give a smoother finish. I used the 3 1/4 setting on my machine.

6.  Hand finish wherever possible!


I'm sure that's not a comprehensive list, but those are my discoveries anyhow. :)

On to the top. This probably shouldn't have worked - which is no comment at all on the pattern, believe me! It's drafted for knit fabrics, and this is a woven with a little bit of spandex thrown in. I couldn't find any knits that were fine enough for the blousey look I wanted. So I got this, hoping that since it's a looser fit the lesser stretch wouldn't be too much of an issue. And it wasn't - in the body. But the neck...well, let's just say I'll be doing hair and makeup after I've got it on! I cut the neckband piece on the bias, and that's the only reason I can get it on at all.


You can see that even with the bias cut, I've stretched it a little getting it on and off...


The only modifications I made to the pattern was to shape it at the sides a bit. I'll probably only ever wear it tucked in, but just in case I do wear it out I need a bit of shape for flattery. Boxy cuts don't really work on me. It's a great pattern though, and has definitely whetted my appetite to try more Named designs.

I've had a bit of a think about how else I can wear the skirt; I'm really trying to get a bit more adventurous when it comes to styling. I think it'll work for winter, with opaque tights and a cropped jumper/sweater. And I think, under certain circumstances, it could be dressed down with a slouchy tee, sandals and a denim jacket. Or it could work with a cardi, or a white shirt, or singlet top. It's actually more versatile than I first thought!

But, I have two questions that I'd love some advice on:

1: All my choices above work I think, but are pretty "safe" colour combinations. What colour or colours would you pair with bronze?

and 2:  How on earth do you wash/clean/ care for sequins??

Any advice would be much appreciated!

Have a wonderful week :)

Danielle oxo


Sunday, August 18, 2013

Refashion: Scarf to Skirt

Hello again! As much as I'm genuinely loving all of our wintry, stormy weather at the moment (truly!), I can't help feeling a little bit excited when I look outside and see definite hints that spring is just around the corner. And that's got me looking at my project queue and rearranging it a little bit - right now I'm wanting to sew up a few transitional garments, rather than strictly cold-weather gear. (Although I think I can just about squeeze in a cosy, long, shawl collared knitted cardigan before the weather really turns...wool is on order!)

With that in mind, I dug out a scarf that was given to me by a friend at work. (Now that people know I sew, I think they're starting to see me as a kind of unofficial op shop...and I have no complaints with that!) I thought I'd taken a before shot, but I can't actually find it, sorry...

It's (or, it was) an Indian cotton rectangular scarf, with a border print running along each edge. Being cream with a black print, I thought it could be paired with cooler or warmer layers fairly easily. By a very happy coincidence, the width of it (plus a very tiny seam allowance) was exactly my hip measurement. Win!


There's no shame in a fourth Ginger skirt is there?! Because that's fast becoming my go to skirt pattern. It's certainly paid for itself, anyhow :). I used this as a base, and made an underskirt of some black voile I had. I cut the ends off of the scarf to the length of the pattern, and created darts at the waistline, leaving the sides straight from the hip point and open from about midway down. (I needed two sets of darts on both the front and back.) This meant the border print was doubled at the side seams, which I liked. The middle piece of the scarf had just enough border print either side to be used as the waistband, which I narrowed to suit.


At this point I had to veer off the pattern: the A-line underskirt sticking out the sides made the scarf look like an apron. Not the look I was going for. So I cut down the sides to be a straight skirt, and squared off the hem also. I left the sides open at the bottom (from memory, about 15cm), which was about half the measurement of the overskirt split. I used an invisible zip on the side seam, so as not to break the pattern on the skirt back. (Back not photographed, but honestly, it pretty much looks exactly the same as the front. Blur your eyes, look at the second photo above and pretend :) )

I'm happy with how this one turned out - it's already done duty as a milder winter skirt (with tights and boots, that is), and I think it'll work equally well with a tank top and sandals in summer. Transitional garment: tick!
I'm not sure how much I would have worn it as a scarf, even though I love the print, because I usually find I look better when I wear a bit more colour near my face. But I think I'll get plenty of wear out of this one :)

Aren't Indian prints wonderful, by the way?? I have an emerald sari I found on ebay in my very small stash that I've wasted far too much perfectly good sewing time just stroking and gazing at it. But I think I've just found the perfect pattern for it, so once spring really kicks in properly, that may need to be the next refashion on the list...

What are you working on the moment? Are you planning for the next season yet, or simply enjoying sewing for this one?

Have a wonderful week :)

Danielle  oxo